


I think a lot of people are intimidated by testing, I certainly was, but it’s not as scary as it might seem initially.
Just like with learning anything else, you don’t need to do it all at once. Just focus in on one thing, and expand from there.
This article is adapted from the following video:
Testing the Inputs
A great place to start is testing the inputs and outputs of your dumb components - that is components that are mostly responsible for accepting an input, displaying something to the user, and communicating any user interaction back to the parent component through an output - it is relatively easy to reason about what the tests for these types of components should be.
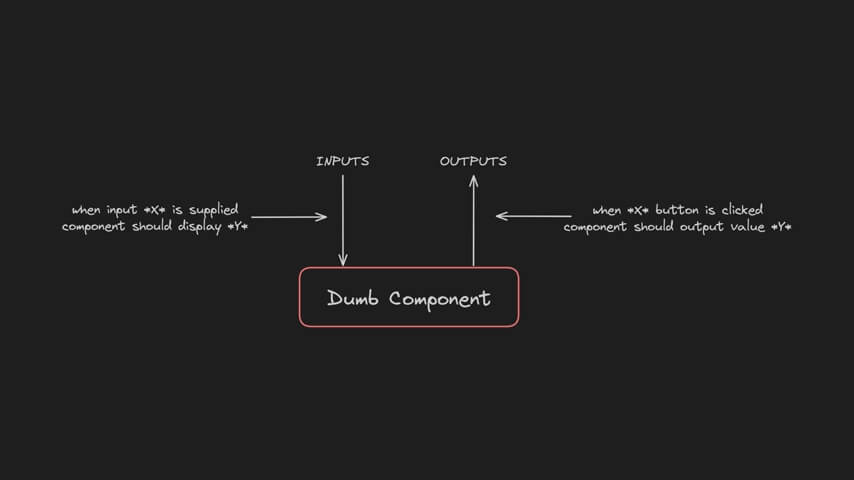
If this component has this value for this input… what should happen? Or, what needs to happen for this output to be triggered with this specific value?
There is more to testing than this of course, but if you focus on just this for now you’ll be able to get a lot of value out of your tests and be well on your way to becoming an expert in testing.
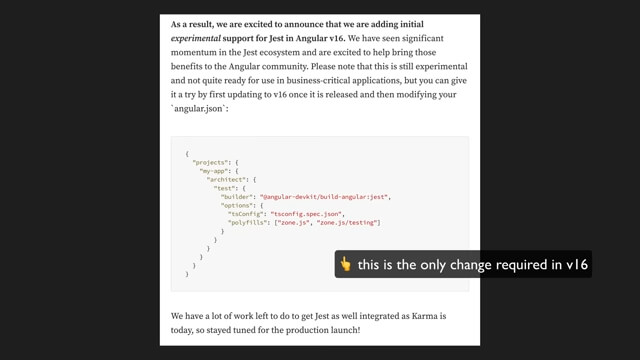
Let’s take a look at an example. Keep in mind that I am using Jest with the new experimental support from the Angular CLI - you can find a link in the description for setting this up in your project. If you’re from the far future, this might already be the default.
Adding Another Test
The first feature I want in my application is this: if the user hasn’t added any checklists yet, they should see a message that says there are no checklists.
I actually got to this point by writing an end-to-end test, but don’t worry about that for now, that can come later - just think about the feature you want to add or think about the features you’ve already added if you are adding tests after the fact.
So, how do I make this happen? Well, I am going to have a ChecklistList component that displays the users checklists, as well as the no checklists message if none have been supplied.
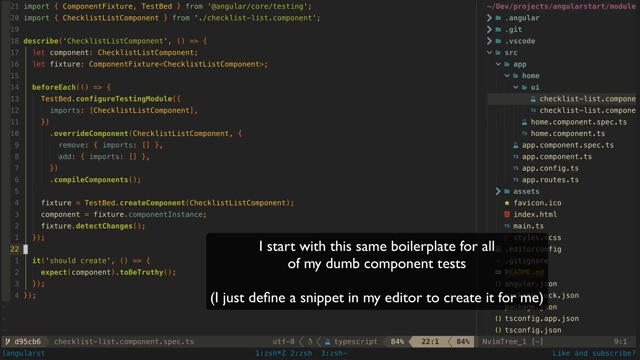
I’ve created an empty component, and I have an empty test file. I prefer a Test Driven Development approach, so I like to write the test first. Again, we are just focusing on inputs and outputs.
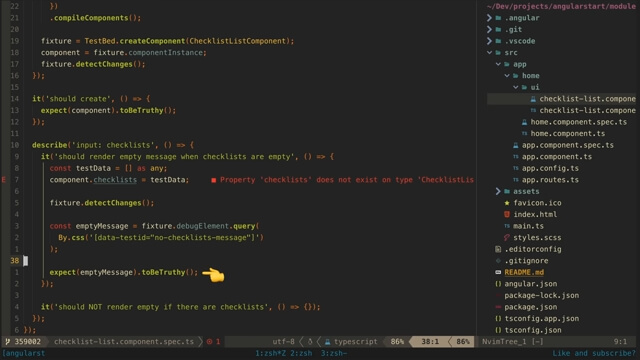
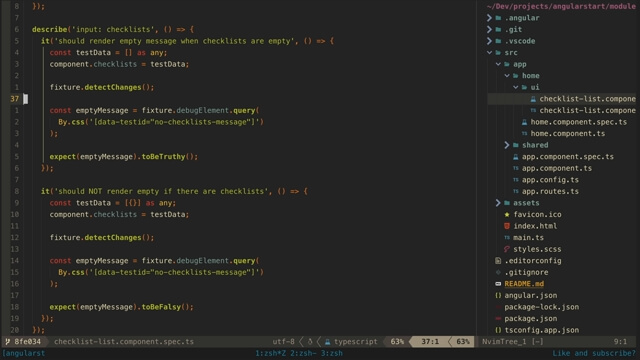
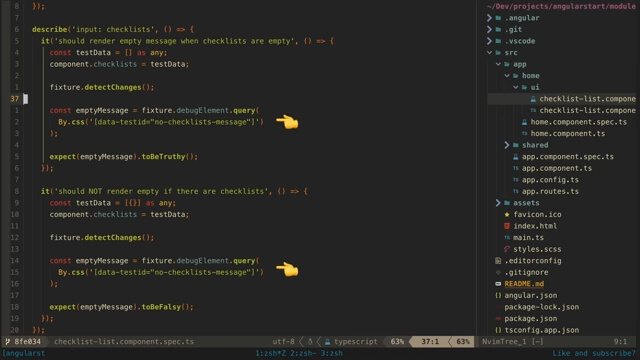
So, I will write a test that the empty message is displayed when the checklists input is empty, and another test that it is NOT displayed when the input is NOT empty. Technically, I could write this as one test, but generally, it makes things clearer if each test tests just one thing.
The structure of most tests will be the same. You set up some test data on an input, then you run detectChanges to make sure the results of this change have been reflected in the DOM, and then you check the DOM for the result you expect - in this case, I expect to find an element that has this test id.
You can use other types of selectors, like class names or tag names, but using a testid helps prevent your tests from breaking due to refactors - for example, you swap out an h2 tag for an h1 tag and your test breaks because the selector is wrong.
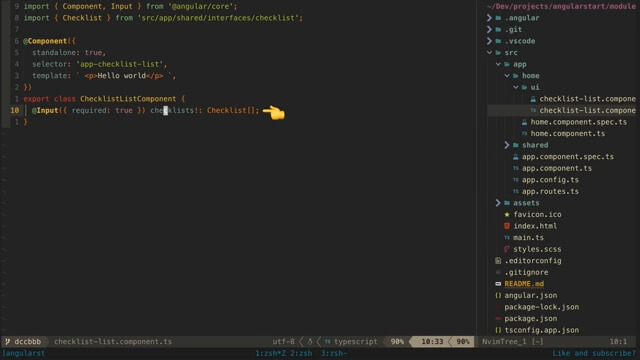
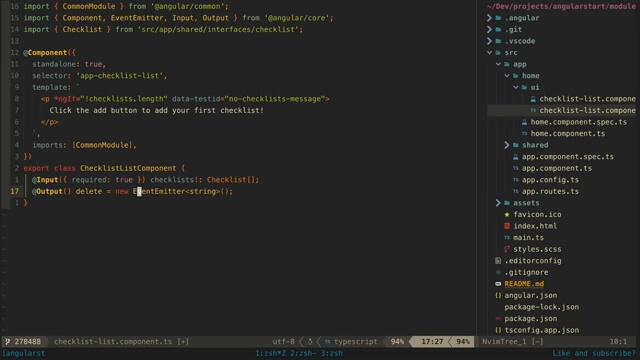
After writing a test, it is important to see that it actually fails - but before we can do that I will need to set up this checklists input on the real component, as it doesn’t actually exist yet and it will prevent our test from compiling.
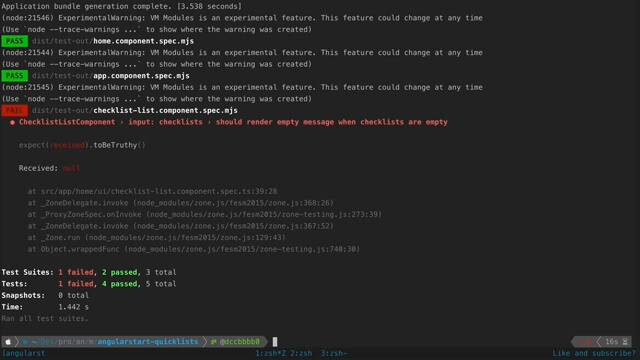
Now if I run ng test, we can see the test fail.
Now we just do whatever we need to do to make this test pass. We are going to be a bit sneaky here and take this very literally. We want to avoid doing more than the test is demanding, and the test never said anything about NOT showing the message. It’s actually a good idea to be cheeky, and try to fool your own tests - see if you can get them to pass in a way that doesn’t satisfy the actual requirements - it’s a good way to make sure the tests are actually valuable and testing what you think they are.
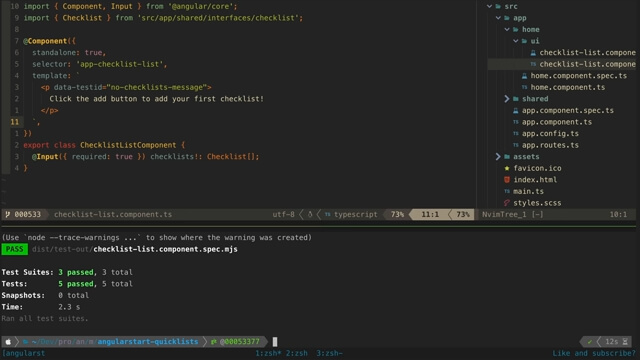
So, I will just add the message to the template without any kind of logic and now the test passes.
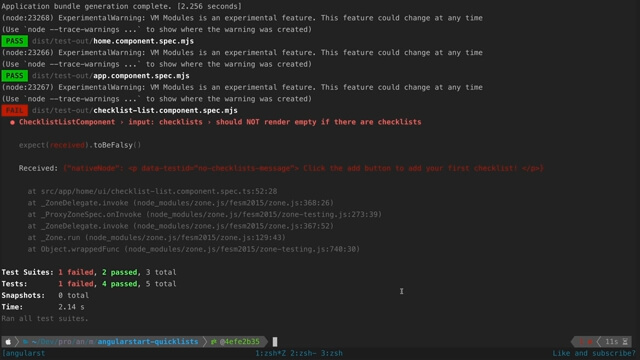
This highlights the importance of our second test. We can test that the message is NOT displayed in a similar way. I can just copy/paste the same test, change the test input, and check for the opposite thing.
As you can see, this test fails.
Now we can implement the code so that both of our tests pass, which will require only showing the message when the input is an empty array.
I will make that change, but if I run the test now it’s actually going to fail due to a type error.
Since we are testing for this length property on the checklists array, it’s important that this input is always supplied with an array. But with our current set up, we are only supplying the input during the test.

We can fix this by setting up a default input of an empty array in our beforeEach block - this will run before each of our tests are executed and will prevent this problem.
If I run the tests again, now both pass. These types of tests are generally always going to look more or less like this - set some test input, run detect changes, check for something or lack of something in the DOM.
Testing an Output
Ok, so what about an output? Another responsibility of this component is that it should display a delete and edit button for each checklist, and when those buttons are clicked it should emit the ‘id’ of the associated checklist so that the parent smart component can then handle editing or deleting that particular checklist.
Let’s focus on the output for the delete event. Again, with a TDD approach I am going to write the test first to describe the behaviour:
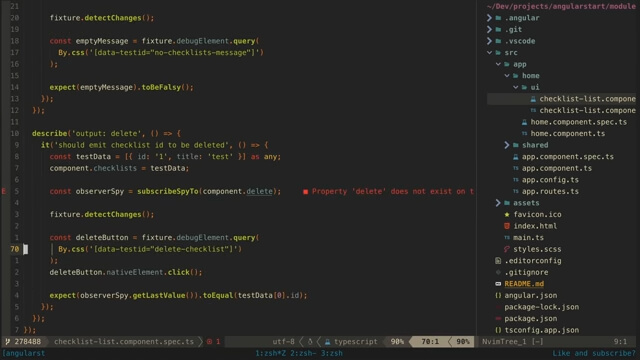
This is similar to the input tests but instead of just giving the component an input and testing what happens, we will make something happen, we will programatically trigger some kind of interaction, and see if the output is triggered with the value we expect.
In this case, we are triggering a click on the delete button and seeing if our output is triggered with the id value we expect. Now, I’m actually using the observer spy library to help me here - technically you don’t need this, but I test a lot of observables and this makes testing observables a whole lot easier - an EventEmitter that outputs uses are also just observables, so it also makes testing outputs easy.
npm install --save-dev @hirez_io/observer-spy
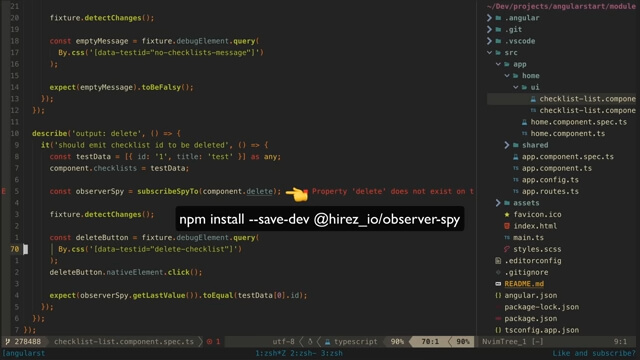
We set up an observer spy on the observable we are interested in, the output in this case, and then we can check a bunch of things about it later - like what the last value that it has emitted is.
Once again, before we can watch this test fail we will need to actually create the output so that the test can compile.
And now we should see the test fail if we run ng test.
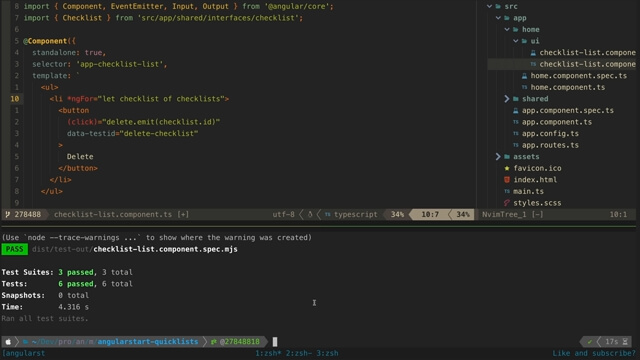
Now we can add the code required to make the test pass:
Note that I’ve kind of skipped ahead here because I wanted to show you an output next - so in order to add the delete button here I’ve also had to create the structure for displaying the list items as well, the ul and li tags - rather than just adding the delete button itself. Typically, I would have done the tests for displaying list data first before moving on to adding the tests for the outputs.
This doesn’t matter though. I’ve still added only what is required for this specific test to pass - you may notice that I am not displaying any data at all for the list like a title - I am satisfying only what the test wants by adding just the delete button to these items.
And we can see now that the test we added passes:
The rest of the data for the checklist will be displayed when I add extra tests for the checklists, like this:

Feel free to have a think about what the implementation for this test would look like. I’ll show you the solution below.
As a hint, the structure is going to look basically identical to our other input tests. We will just supply different data as input, query for a different DOM element, and have a different expect statement.
Solution
Ok here’s my solution:
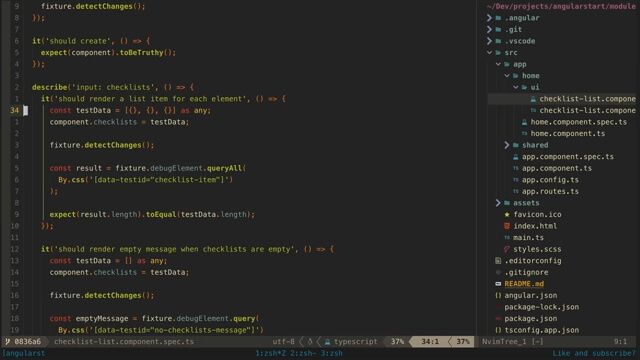
It’s okay if your solution doesn’t look exactly like this - there is not one correct way to test, just as there is not one correct way to code a feature. All I care about in this test is ensuring that an element is added to the DOM for each of the checklists supplied as input - displaying the actual details, like the title, is something I like to cover in end-to-end tests, but you might prefer to also test for specific title data here.
I’d encourage you to focus on testing in ways that make the most sense to you, and that can change over time as you become more experienced in testing. You don’t write only good code when you’re learning to code, and you won’t always write good tests when learning to test. Writing bad code and bad tests is a necessary step to writing good code and good tests - just keep doing it.
Conclusion
Now, as I mentioned before, this is not a complete picture of testing. The problem here is that dumb components like this don’t really do anything by themselves - I’ve created the component and its tests, and they all pass, but the component is still not displayed anywhere in the app. We are going to need a smart component to host it, and the tests for smart components are going to look a little different.
But that doesn’t mean our tests for the dumb components aren’t still valuable in themselves, even if they don’t have accompanying integration and end-to-end tests. You can add in more later, once you’re feeling comfortable with just this one sub-section of testing. Then, the rest of it won’t seem as scary.